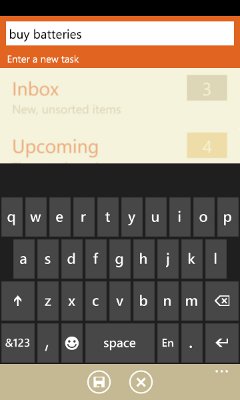
lil todo has a smart feature which auto-files tasks that you create. If you want to see it in action right now, bring up lil todo and on the front page, create a new task called “buy batteries”.
Hit save, then go to the Inbox. You’ll notice that your task isn’t there. Where is it? Go back to the front page, then tap on Contexts to view your contexts. Tap on the Shopping context. There’s your task!
So what happened? Well, lil todo noticed that the task started with “buy” and auto-filed it in the Miscellaneous folder and auto-assigned the task a “Shopping” context. If you go back to the front page and click on Miscellaneous, you’ll see your task is here as well.
Whenever you create a new task, we detect certain words in your task name and give the task the correct context. If you’re creating a new task on the front page or in the Inbox, we’ll also auto-file the task in the Miscellaneous folder to keep it out of the way.
While you’re viewing a list of tasks in a context, like the Shopping one, hit the “+” button to create some more tasks that get assigned the Shopping context. Any new tasks you add while viewing a context get auto-assigned that context. We think you’ll find that when you’re browsing other tasks in your context, your mind will start coming up with other related tasks, so we made it easy to add more.
Freakin’ contexts, how do they work?
So what are contexts? Think of a context as your current location or mental state. By using contexts, you can quickly see all the tasks that you can do right now if you are in that context. (All tasks can get placed in a context and a project at the same time, so don’t worry about using both.) You could create a context for books you’d like to read, and next time you are at the library or browsing books on Amazon, you’ve got your list ready to go. Actually, we have an auto-assign rule for reading!
Go back to the front page and create a new task called “Read War and Peace” and go to the contexts page and notice there is now a “Reading” context, which contains your new reading task.
Here’s a complete list of the current auto-assign rules:
- Begins with “buy” or “purchase” -> Shopping
- Contains “laundry” or “clean” -> Home
- Starts with “watch” -> Watching
- Starts with “read” -> Reading
- Starts with “download” -> Online
- Starts with “listen to” -> Music
- Starts with “call” -> Phone
These auto-assign rules are currently not customizable, but we’ll consider it for future versions.
Other Ways of Assigning Contexts
As a shorthand for filing a new task in a context, you can prefix a context name with @ somewhere in your task name and it’ll get placed in that context. Give it a try now by creating a task called “Talk to Barney @work”. You’ll find the task gets auto-filed into the Work context.
Finally, a couple more pointers: when editing tasks, you can always set the context for a given task manually. Additionally, in the Contexts page where all contexts are listed, you can create more contexts by hitting the “+” button. You can get creative with the name, but keeping it short makes things easier. If you make the name one-word only like “work” or “errands”, you can use the @ shortcut on it, too.
That’s all you need to know to work with contexts. Let us know what you think of the contexts feature in the comments below!


