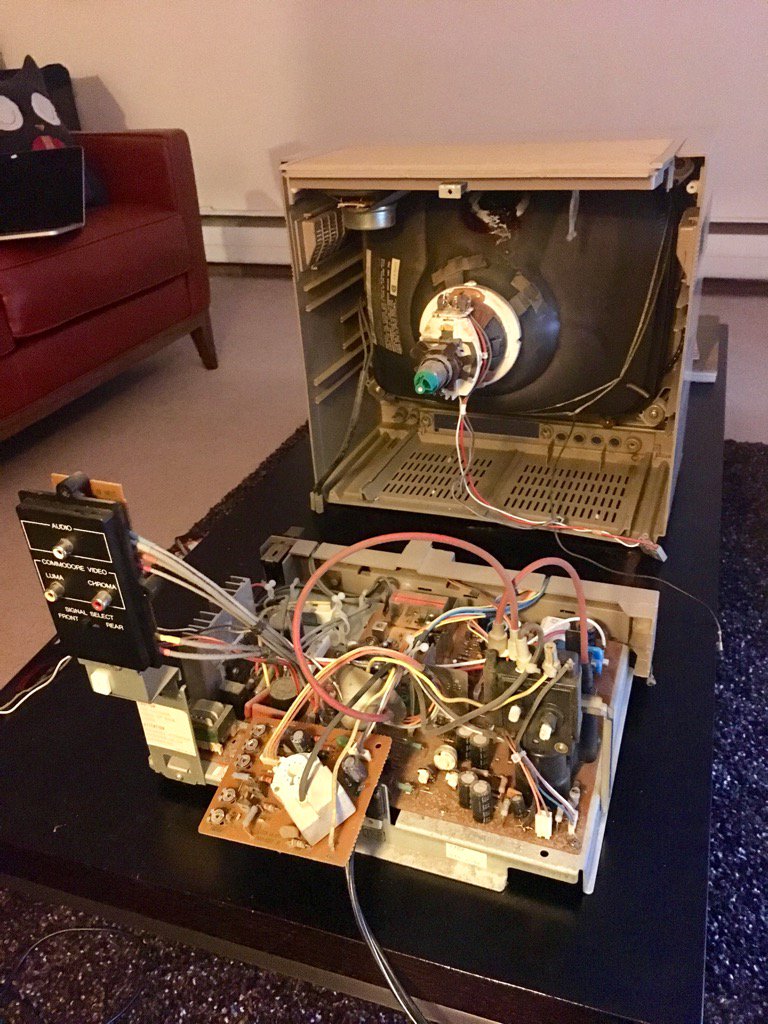
I’ve got a Commodore 1702 monitor and it’s been flickering a lot lately. It’s high time for a re-cap. I’ve got a cap kit and am ready to go.
I opened it up and this is what it looks like on the inside. Note: it has a lot of capacitors, so I’ll have to do this over several sessions as soldering is a laborious process. 🙁
If you’re doing a re-cap of a 1702, here’s a good diagram of all the capacitors. I bought my cap kit from Console5.
Some quick notes about opening up the Commodore 1702:
- There a bunch of screws in the back. After unscrewing all of them (including the ones near the rear inputs), store them all together somewhere. They’re all the same.
- There are three screws in the front. Store these together. They’re different from the back ones.
- Pull apart the front and back plastic frame carefully.
- Next, discharge the cathode ray tube for safety. Please look up how to do this online. It’s very important as you don’t want to zap yourself. The CRT can store thousands of volts even when unplugged!
- After discharging the CRT, slowly pull the CRT neck PCB off the neck tube. You’ll need to slowly wiggle it backwards to get it off.
- Remove the flyback transformer “suction cup” from the top of the CRT.
- Unplug the ground wire from the neck PCB.
- Unplug the speaker wires.
- Unplug the three-wire input (sorry, don’t know the term for this) coming from the CRT into the main chassis PCB.
- Unplug the two-wire input input (don’t know this term either) from the CRT going into the main chassis PCB.
After doing the above, you can separate the chassis PCB from the CRT itself. This is what you see in the picture above.
For me, the next step is to de-solder, remove, and replace each capacitor from all the boards. I’ll do this one by one so I don’t get lost. (Removing all of them at once would lead to confusion when replacing them. I’d have to constantly look at the diagram!) I’m not sure yet if it’s better to unscrew the chassis PCB from the frame or if I can just work on it directly. We’ll see.
More updates coming soon!
