 Card Buddy
Email Contact
If you are experiencing issues with the app, please contact support@ussher.ca.
Common Topics
- Import and Export (Google Sheets, Microsoft Excel, Scrivener)
- Where Are My Card Buddy Documents?
- Moving Documents On iOS
- Keyboard Shortcuts
- Card Arrangement
- Text Formatting Options
- Printing
- Syncing documents across multiple devices
- iOS: Creating new documents in your iCloud Drive
Help
Additional Card Buddy help coming soon. Be sure to use the tutorial document in the app to get started. If you still have questions, please use the Send Feedback feature within the app to send an email. I’ll be sure to update this page with more details based on the questions I get.
To view the tutorial in the Mac app, hit cmd-N to bring up the New Document window and then press the “View Tutorial” button in the bottom-left corner. On iOS, you can view the tutorial document in the Samples folder.
Import and Export (Google Sheets, Microsoft Excel, Scrivener)
If you’ve been using a spreadsheet app, such as Google Sheets or Microsoft Excel, to make notes in a tabular format, you can import these notes into Card Buddy! Likewise, you can export your notes to these spreadsheet apps, and even Scrivener.
- Importing from other apps (Google Sheets, Microsoft Excel, etc.)
- Exporting to other apps (Google Sheets, Microsoft Excel, Scrivener, etc.)
It’s also possible to export to PDF. This will generate a single-page PDF of the entire canvas. If you would instead like to export to PDF as a linear document or as individual pages (one per card), you can use the Print option in the app and save to a PDF instead of sending the file to a printer.
Where Are My Card Buddy Documents?
On iOS, you may have created your Card Buddy document in a folder either on your device or on iCloud. If you are having trouble locating your documents, there are a couple of quick and easy ways to find them.
Firstly, if you recently created the document, tap on the “Recents” tab at the top of the screen to see a list of documents you edited. Your document will likely be found here.
Secondly, if it’s not in the Recents tab, you can use search to find it. In the file browser screen in Card Buddy, tap the magnifying glass in the top-right corner. When the search field shows up, type “.cards” (without the quotes). This will search for all documents with the file extension .cards, which is what Card Buddy uses for its document files. You can tap on the tab at the top of the screen to switch between Recents or On My iPad (or On My iPhone if you are on iPhone).
Thirdly, if you have iCloud enabled, your file may be on your iCloud Drive. The search mentioned earlier only searches on your device or on your iCloud drive, not both at the same time. To search iCloud, tap the side bar icon to bring up the side bar on iPad and then tap “iCloud Drive”. Once you are browsing the iCloud Drive, you can tap the magnifying glass again here to search for Card Buddy Documents. On iPhone, tap the Browse button at the bottom of the screen to view the list of locations to browse, instead of using the side bar button. Here you can tap iCloud Drive and then search on the next screen.
Card Buddy initially creates a Card Buddy folder on your device. This is most likely where the documents you created are found. Additionally, you may also have a Card Buddy folder on your iCloud drive.
Moving Documents On iOS
When using the file browser, you can move documents from one folder to another or from your device to your iCloud Drive, and vice versa. To move files, simply long press on the document in the file browser. After about a second, a menu will appear, and from there you can tap Move to begin the move operation. You will be asked for the destination folder to move to. Once you’ve browsed into the folder, tap the Move (or Copy) button in the top-right corner. If you are from your device to iCloud (or vice versa), you will only have the option to Copy the document.
Keyboard Shortcuts
In the Mac app, these keyboard shortcuts are available to you for quick actions. (Most of the editing and navigation commands are also available on iOS.)
Canvas Mode - Editing
- Return - Edit card at cursor.
- shift-command-Return - Insert card at current cursor location, shifting other cards out of the way.
- shift-command-] - Flip card
- command-D - Duplicate card at cursor.
- command-1 - Toggle between Auto-style and default format
- command-2 - Toggle between Markdown formatting and default format
- command-3 - Toggle between plain text formatting and default format
- command-/ - Show color picker for card background.
Canvas Mode - Navigation and Organizing Cards
- command-arrow key - Move to edges of canvas.
- option-arrow key - Move cursor to end of current card group or start of next card group.
- Spacebar - Toggle Focus Mode on a card.
- control-command-C - Copy reverse side of card.
- shift-command-R - Insert blank row.
- shift-command-K - Insert blank column.
- Del - Delete card at cursor and keep cursor at the same location.
- Backspace - Delete card at cursor and move cursor to previous card.
- control-arrow key - “Sweep” card to neighboring cell. This causes the card under the cursor to be moved to a neighboring row or column without moving the cursor.
- shift-control-arrow key - “Carry” card to neighboring cell. Similar to sweep, this moves the card at the cursor to a neighboring cell. However, it also moves the cursor with it.
- control-N - Insert blank cell at cursor location.
- command-] and command-[ - Indent and remove indent of a row of cards in grid layout.
- command-0 - Toggle zoom on cursor.
- command-= and command-minus - Zoom in and zoom out of canvas.
- shift-command-I - Show preview of image in card.
Track Pad and Mouse
- double-click - Create card or edit existing card.
- click and drag on canvas - Draw selection box.
- shift-click and drag - Draw a selection box.
- shift-control-click and drag - Pick up single card and do not auto-arrange any neighboring cards around it.
- right click and drag (Mouse only) - Grab and move the canvas.
- control-click and drag - Grab and move the canvas.
- option + scroll wheel (Mouse only) - Zoom in and zoom out.
Canvas Mode - Finding Cards
- command-F - Find card. While in the search field, hitting Return will cycle through all matches. Hit Esc to exit Find Mode.
- command-G - While in Find Mode, cycle through the matches in the canvas. shift-command-G cycles in the reverse direction.
- command-L - Go to card. This is similar to a find operation, but hitting return in the search field will jump to the first card matching the filter.
Editing Card in Canvas Mode
- Esc - Discard edits.
- command-Return - Save edits.
- shift-command-Return - Save edits and insert another card and begin editing the new card.
- arrow keys, tab, shift-tab - Save edits and move cursor while staying in edit mode.
- option-Return while editing a card inserts a new line. This is most useful if you enable the “Enter key saves and moves card cursor” setting in the document preferences.
Focus Mode
- left and right in Focus Mode cycles through the cards in “logical order”. For grid layout, this is left to right within a row, and then wraps around to the next row. For kanban layout, this is top to bottom within a column first, and then wraps around to the next column.
- Esc in Focus Mode leaves focus mode.
- command-Return - Save edits.
Card Arrangement
Card Arrangement refers to how cards push other cards out of the way whenever they are dropped onto the canvas, or whenever a new card is created at a location on the canvas. There are three settings available for Card Arrangement and they can be changed at any time by accessing the Card Arrangement dropdown in the toolbar (Mac) or in the ellipsis menu (iOS):
- Push Right
- Push Down
- Stack
When a card is dropped at a location, if there is already a card there, it is pushed out of the way to make room for the new card. This causes other adjacent cards to be pushed out of the way. If you choose “Stack” for the Card Arrangement, the cards are not pushed out of the way, but instead stay where they are and any dropped cards stack on the cards already at the location.
Pick-Up Behavior
When using Push Right or Push Down, if you pick up a card to move (or delete a card), any adjacent cards will be pulled in to fill the missing space left by that card. Under the Stack option, cards are not pulled in.
If you would like to temporarily prevent cards from moving when you pick a single card, hold down shift and control while dragging a card. Note that this feature only supports moving a single card at a time and does not affect the current card selection.
To disable cards arranging whenever an adjacent card is picked up, toggle the “Auto-Arrange on Pick-Up” option off in the Card Arrangement menu (in the toolbar on Mac; in the ellipsis menu on iOS).
Text Formatting Options
Card Buddy current has three options for text formatting:
- Plain text
- Auto-style
- Markdown
Auto-style is a great way to quickly formatting text that has a heading and body text. When this formatting is chosen for a card, the first line of text will be formatted in a heading style. If there is a line of text immediately following it, it will be styled as a sub-title to the heading. (You may leave the line after the heading line blank if you don’t want sub-title.) The rest of the lines following will be styled a regular body text.
Markdown allows you to format your text using special characters, such as asterisks around words to italicize them. For more information on the syntax, check out this cheat sheet.
Here are examples of each formatting option, showing what you type and how the card looks after saving:
| Format | What You Type | How It Looks |
|---|---|---|
| Plain text |  |  |
| Auto-style (with subtitle) |  |  |
| Auto-style (without subtitle) | 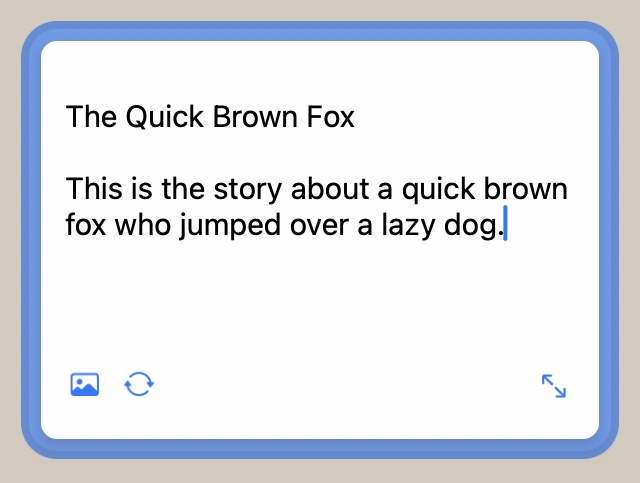 | 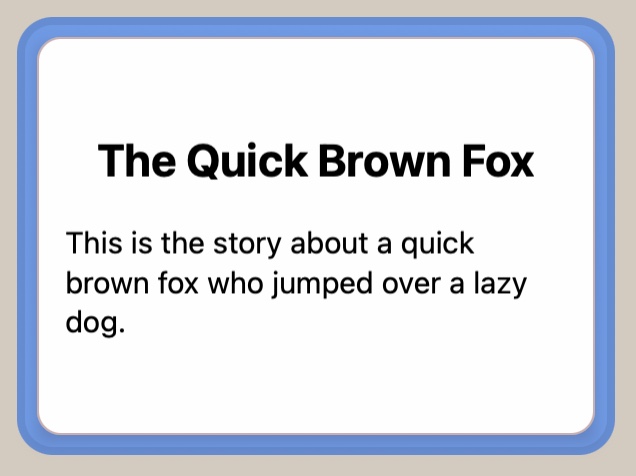 |
| Markdown | 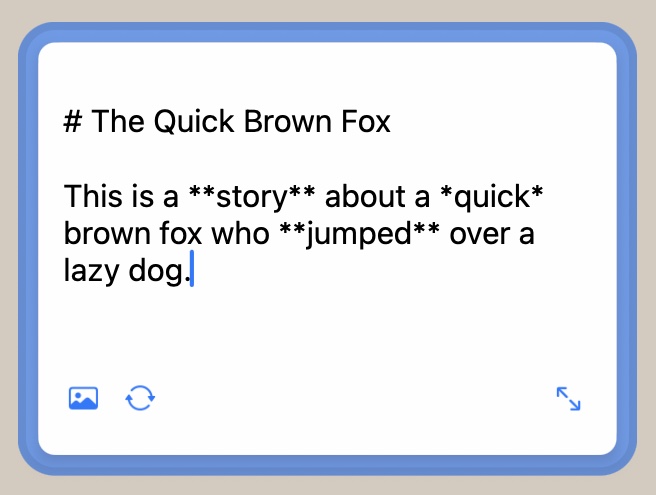 | 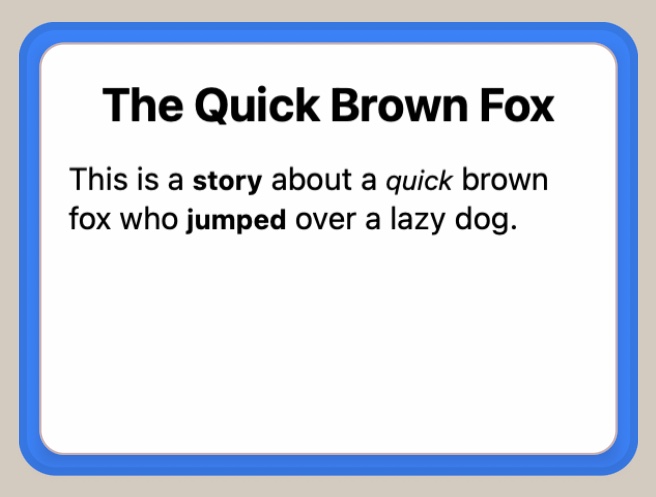 |
Looking for a more traditional rich text formatting, using buttons to bold or italicize selected text? Card Buddy currently doesn’t offer rich text formatting, but it is in the roadmap. Many users have requested this feature, so it will be added soon.
Printing: Standard Document vs Cards
Card Buddy lets you print your document in two ways: either as a “Standard Document” or as “Cards”. The former will cause all text to be laid out on the page as a linear narrative, doing away with the card boundaries entirely. The latter will print out each card to its own page. The Cards option also has the capability of printing multiple cards on each page. See below for how to do that. This is a great way to share your board with others in meetings.
Note: at the moment, there is no way to print the entire canvas as a single page, but I’m working on it. (If you have thoughts on this feature, be sure to send feedback using the Send Feedback feature in the app.)
Printing Multiple Cards to a Single Page
If you would like to print multiple cards to a single page, follow these instructions.
On macOS:
- Click the print button in the toolbar, then click “Print As Cards”. This will bring up the print dialog for printing a single card to each page. Alternatively, you can also use shift-cmd-P.
- Once the print dialog appears, click “Layout” to expand the Layout section.
- From here, you can change the number “Pages per Sheet”. This will let you print multiple cards to each sheet.
- Optionally, you can change the Border style if you would like a border drawn around each card.
- Click Print, or click the PDF button to save to a PDF file.
On iOS:
- Tap the print button, then tap the Cards menu option. This will make it so that each individual card is printed to its own page.
- To print multiple cards to a single page, tap Layout, then Pages per Sheet, then tap the number of “pages” (i.e. cards) you’d like to see per sheet.
- Hit back, then optionally tap Border to pick a border to draw around each card.
- Finally, tap Print, or hit the Share button to share or save the file as a PDF.
An example of printing several cards to the same page.
Printing Only Selected Cards
If you want to limit which cards are printed, simply select two or more cards before starting the print process. Only the selected cards will be printed.
If you are viewing a card in focus mode (i.e. pressed spacebar on a card in the Mac version, or hit the eye icon on iOS), printing will only print the current card being viewed. Exit focus mode if you’d like to print the whole document.
Note that this behavior works the same when exporting to Markdown file. If you select two or more cards, only those cards will be exported.
Exporting to PDF
To export your cards to PDF, you simply start the process as if you were goint to print. However, when you get to the print dialog, on Mac, click the PDF button to save to PDF. On iOS, tap the share button to either share the contents as a PDF with others or to save it to your iOS device.
Saving Files and Syncing to iCloud
If you would like to be able to use Card Buddy to edit the same document from a Mac and an iOS device, it is possible, although you will have to manually save or move your document to an iCloud folder first since Card Buddy normally saves your documents to a folder that is accessible only on a single device.
Card Buddy supports editing the same document across multiple devices, so long as the document is stored in your iCloud folder. (Editing a document across multiple devices is currently not supported if the file is stored on another cloud-based file service.)
iOS: Moving a Card Buddy Document to iCloud Drive
If you have an existing document, on iOS you can move the file to your iCloud folder this way:
- Launch Card Buddy
- Find the document you wish to move to the iCloud folder in the file browser within Card Buddy
- Long press the document icon
- A menu will appear. Tap the Move menu item to move the file.
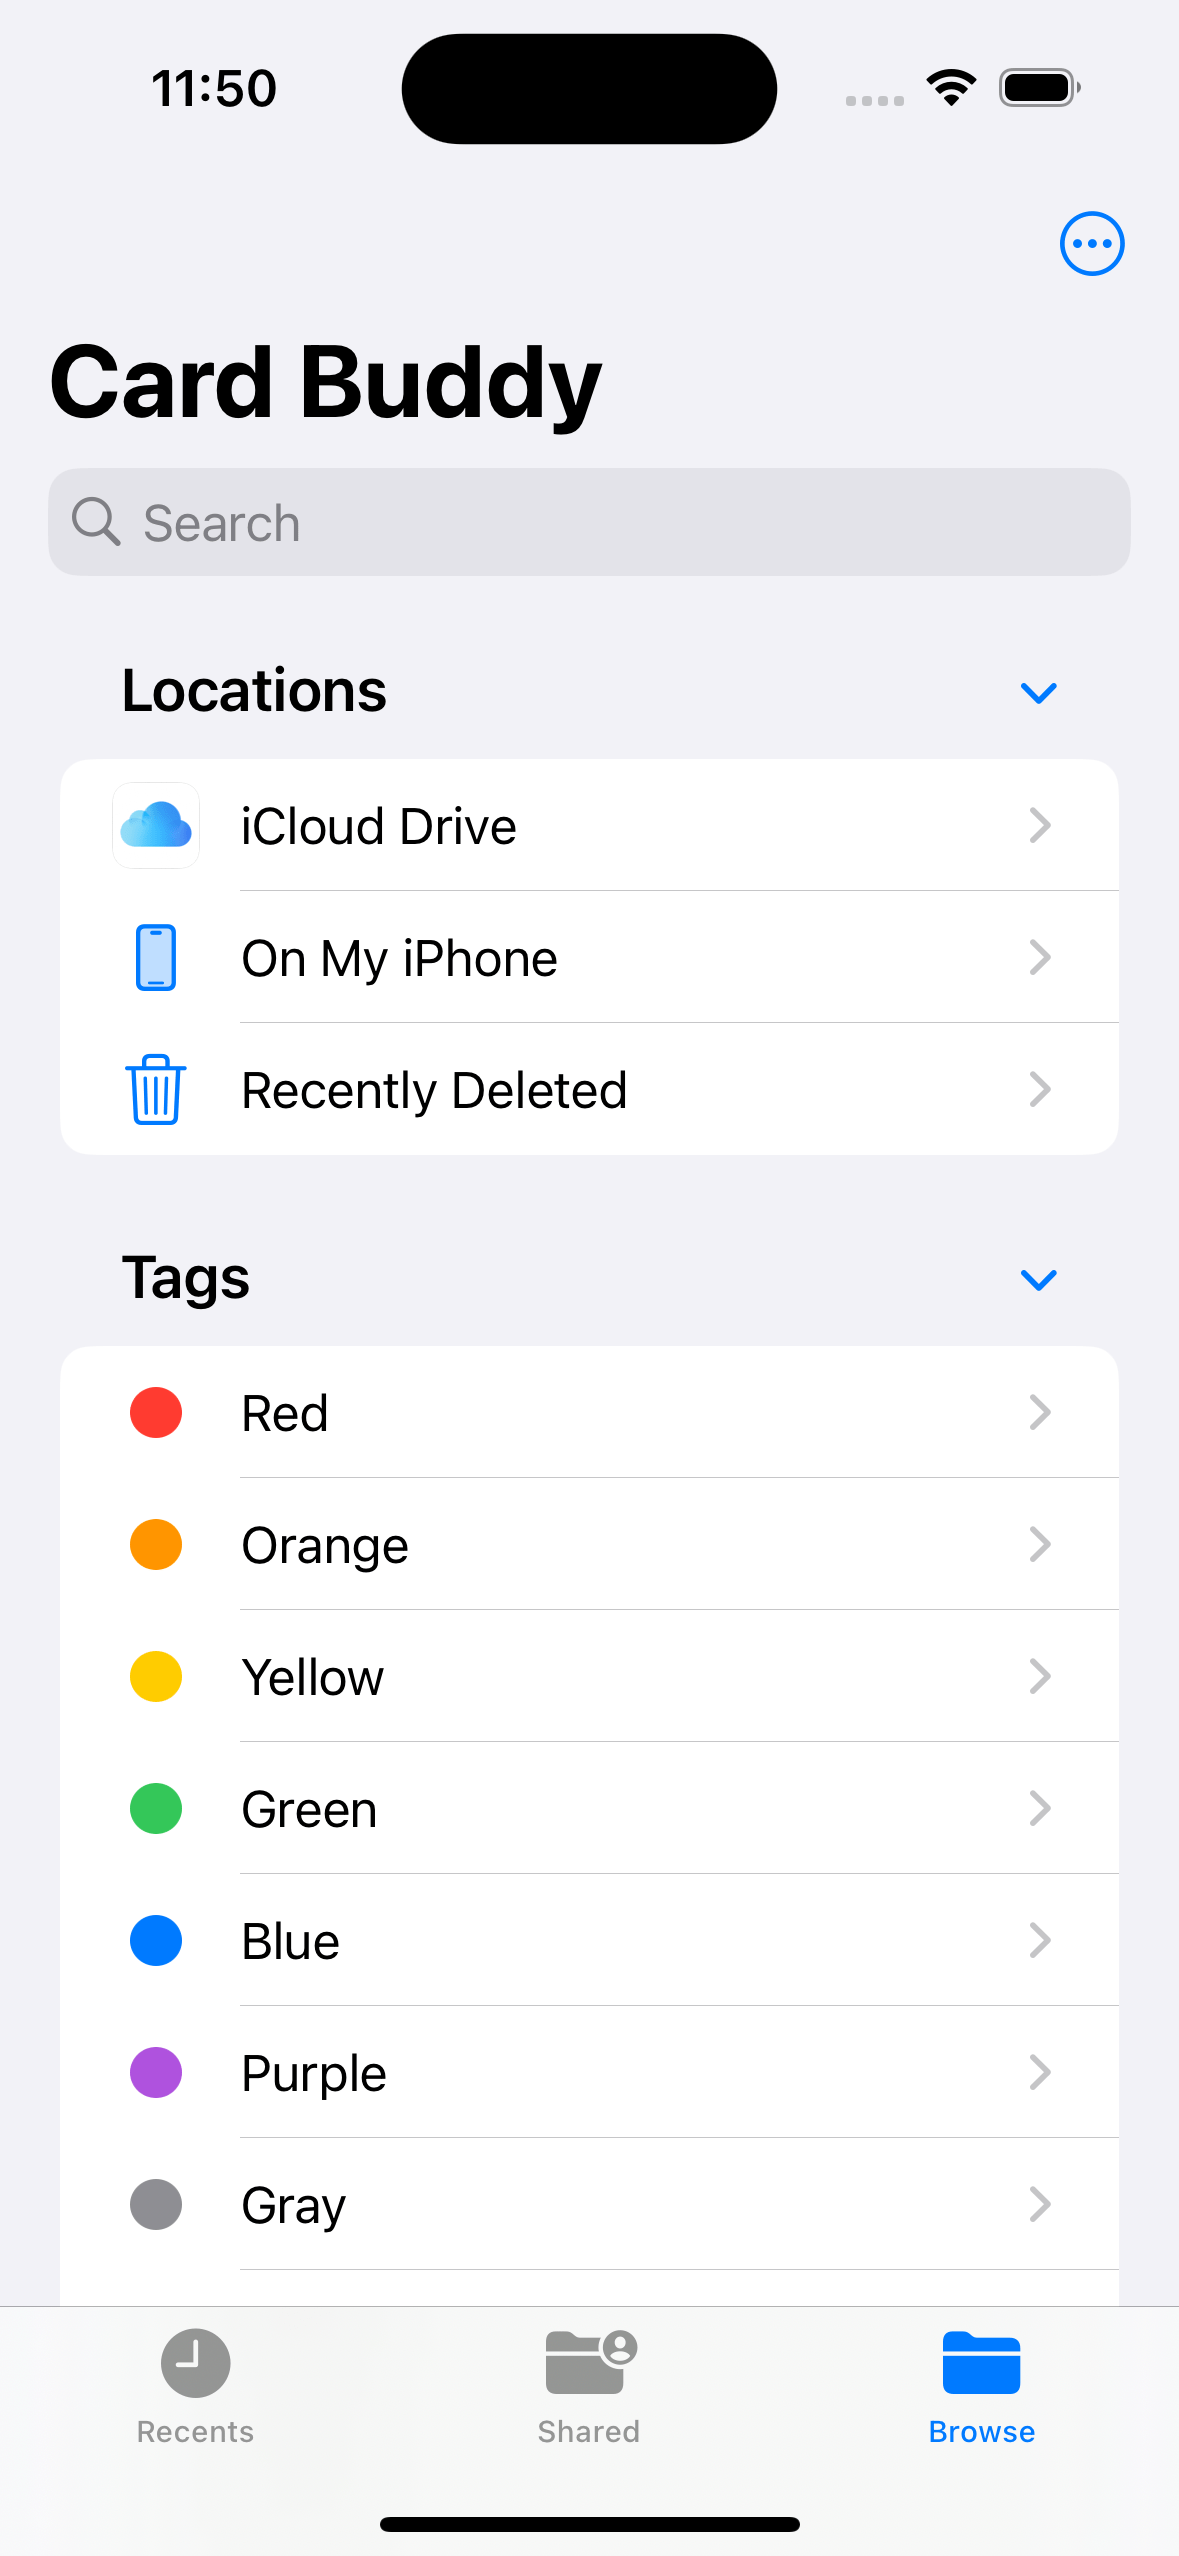
- A new screen will appear allowing you to pick the destination folder. Tap the back button several times in the top-left corner until you see a screen similar to the one below. (It might take two taps to navigate from the Card Buddy default folder to the top-level screen.)
- Under “Locations”, tap “iCloud Drive”, which will navigate the browser to the iCloud Drive folder
- From there, either select an existing folder or create one for your shared Card Buddy files. (Press the “…” button to bring up a menu if you would like to create a new folder.)
- Tap Move to move the file there
- After tapping Move, the file will be moved and you’ll be back at the Card Buddy file browser. To navigate to the folder that contains the document you just moved, tap the Browse tab at the bottom-right of the screen until you see a screen similar to the one below.
- Tap iCloud Drive as you did earlier and then navigate to the folder you chose in step 7.
iOS: Creating New Card Buddy Documents in iCloud Drive
Whenever you tap the “+” button in the file browser in Card Buddy, the new document you create will be created in whichever folder you are browsing. If you would like to make your document available on your Mac or other iOS devices, be sure to first navigate to your iCloud folder before tapping the “+” button. Otherwise, you can move the document later to the iCloud folder as the previous section describes.
Using Your iCloud Drive on a Mac
On a Mac, you can find the iCloud Drive by bringing up a Finder window and looking for “iCloud Drive” in the left sidebar. If you don’t see the iCloud Drive there, make sure to setup the iCloud Drive feature.
From within Card Buddy, you can press cmd-O to open the file browser, then navigate to the iCloud Drive in the left sidebar to find your iCloud folder.
If you have existing documents created by Card Buddy on Mac, they will typically be saved in your Documents folder. You can use Finder to move those documents to your iCloud Drive by dragging and dropping from the Documents folder to the folder on your iCloud Drive.
Finding the Default Card Buddy Folder on iOS
When you first installed Card Buddy, the app created a Card Buddy folder that is only accessible on your device. This is where your documents are stored normally, but it isn’t available from other devices. (See the previous sections for details on making the file accessible on your Mac or other iOS devices.)
If you would like to navigate back to the default folder, tap the Browse button in Card Buddy’s file browser to first go to the top-level screen. From there, tap “On My iPhone” to list the folders on your device. From there you should see a folder named Card Buddy. This is the default folder the app used when first installed.